DIY Customized Messenger Bag: a tutorial of sorts
Anyone attending a conference these days is expected to take possession of, and tote around, a sizable load of low-quality bag/shirt/cup/pen/toy trinkets. An odd custom – most swag is destined for the landfill in short order – but ubiquitous none the less.
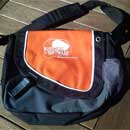
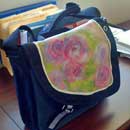
Last year I received a conference bag that actually got my notice. As to be expected it is poorly made and lacking in features, but I rather like the square-ish shape and rakish flap.
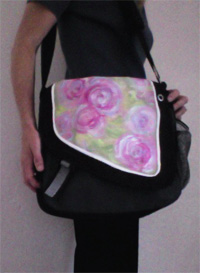
Right off I envisioned the bag with swirly cabbage roses on the flap. I have no idea why that particular vision came to mind, but inspired I was. So off I went to the local mega-craft store to get a bunch of inexpensive fabric paints: spray-able white, matte pink/fuchsia/blue, and silver metallic.
I started with a Sharpie permanent marker to black out the white advertising text on the back of the bag. This worked remarkably well: you can still see the writing if you look closely, but it’s well camouflaged.
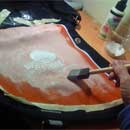
Covering up the bright orange background on the front flap was more of a challenge. I used the spray-able white paint which has a whitewash consistency and applied it with a foam brush. After five separate coats the orange was barely visible.
Next, I put the bag on a shelf and forgot about for many months. Suddenly this week I got the urge to finish it.
Painting
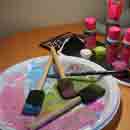
The image on the flap took about two hours to paint. The paints blend and mix easily and dry quickly with a nice matte finish. I did most of the painting with a foam brush, but also used my fingers to push paint around and soften edges.
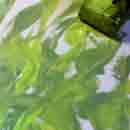
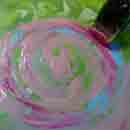
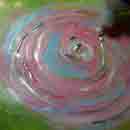
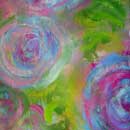
First I put down a layer of sage green paint in vaguely leafy shapes. Then I laid out the flowers with swirls of light pink, followed by dark pink, light blue, and around the colors again until I liked the result. I finished up the background by applying the green paint in more specific foliage shapes, using the lighter green to suggest highlights and edges.
Lines of metallic paint made for interesting texture on the flowers but looked a bit stark to me. I went back in with the flower colors on my fingers to soften the silver lines here and there: that did the trick. Finally, I took a look at the image as a whole and added blobs of color where I thought it would help with balance or light.
The piping around the painted area was white to begin with but i had to use heavier white fabric paint and a real paintbrush to cover splotches and restate the white. Then the black sharpie came out one more time to cover some paint that had found it’s way onto the black canvas.
Voilà! The next day I was able to use my new bag. I am quite pleased with the result, I must say. I do wish the bag itself were a bit sturdier, but for now it works nicely.
What’s Next?
Now that I have this project done, it is time to customize a better bag. Any canvas bag should take the paint well, although Timbuk2 and Case Logic make bags specifically for personalizing.
Have some conference swag lying around? Bags or T-Shirts perhaps? Consider using it to experiment with. The design needn’t be elaborate: a border of dots or swirls or a small image would be enough to make it one-of-a-kind. What have you got to lose?
❀ ❀ ❀

